Friday, March 31, 2017

Artsy Thanks

I used the new Artsy Flower Parts stamps and dies by Simon Says Stamp to make a card with some rainbow flair...
 I stamped, embossed, die cut, then colored the flowers with sharpie makers.  I stamped and heat embossed the stems and leaves, then colored the leaves with a prismacolor marker...Leaf green.  I die cut the rectangle and dotted the stitched panel with three enamel dots.  The sentiment stamp is from an older Simon set of stamps, Thanks.  I layered then adhered the flowers to the panel.  Here's a close up...
Such sweet fun...how I LOVE, LOVE, LOVE flowers!!  Thanks for visiting me today!! Hugs!! Lisa

Thursday, March 30, 2017

You are Pretty Amazing

I recently saw a Tim Holtz video at the CHA ..found HERE, and got really curious about the new Distress Oxide Inks.  Due to their popularity, it's hard to find them in stock, but I managed to get my hands on some and made a card!...
 I used some pistachio, broken china and wilted violet, smeared on my Tim Holtz craft sheet, and then smeared a wetted piece of watercolor paper onto the inks.  I paper toweled off some excess... and wound up liking the muted look that happened when I did that...this is so much fun with a different look EVERY time:):)!!  I thought it "needed" something more, so I added added a partially stamped Simon Grid stamp, along with a Simon sentiment die and it's coordinating sentiment stamp.  I glossy accented the "You".  Here's a close up of them all...
Definitely will be seeing more of this fun ink:)!!  Thanks for visiting me today!! Hugs!! Lisa

Sunday, March 26, 2017

One More Border Die Card...with Linen Ribbon

I used one more of the dies from the Simon Says Stamp Envelope Liner die set to make a weaved ribbon card...
Here's what the die looks like...
This die has little rectangles...the perfect width for narrow ribbon...and the thought of the Tim Holtz Linen Ribbon seemed really perfect.  I opted to color one strip of the ribbon with black marker...the first pic below, then weaved two strips of the natural and the middle strip with the black ribbon...what's really cool about this ribbon is that it has the ability to widen...just pull on it, so it was wonderful to work with!  
I die cut this die sort of like I did the dies the last two days...as this die is not long enough to fit the entire length of the card...here's what I did(don't mind my beat up Big Shot:)!)...
 I lined the border up on the panel, taped, then die cut...
then I put the die to the top of the panel, fitting it into the already die cut pieces, taped and it's die cut from top to bottom:)!!
 I stamped a sentiment from Simon's Hydrangea Blooms, then clear embossed..   Here's a close up of the ribbons...
Weaving ribbon, who knew it would be so much fun!  Thanks for visiting me today!! Hugs!! Lisa

Saturday, March 25, 2017

Sending Love with Hearts Made Border

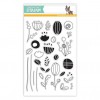
I used another one of the dies from the Envelope Liner die set to make a border of rainbow hearts card...
The die looks like this...
No...it's NOT a border die...but I wanted to MAKE it one.  So...I used the die plus my T-ruler(to keep the die straight across the card panel, and die cut five times like I did for yesterday's card, keeping one of the pieces of the die in an already die cut heart, and die cutting 2 more hearts each time with the die and the T-ruler....until you make it across the panel.  This is what it looked like die cutting the first two times...
I put the die as close to the edge as possible with a tiny piece of space, lined up the t-ruler,
 adhered with some tape, then die cut.  I placed the die over the last heart of the three already cut hearts, 
 lined my t-ruler above it, and pushed the die up against the ruler, taped it,then
die cut...and so it will go three more times.

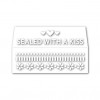
I used a sentiment from the Hydrangea Blooms set, that goes perfectly with a row of colored hearts!  I layered underneath with some rows of heart "mistakes" that I had made trying to perfect my line of hearts(they were slanted and not straight, but perfect to be adhered underneath), and I filled in the hearts with, what else....paint chips!!  
Here's a close up...
Simple, although it did take me a number of tries experiments to get to the finished product...make sure you use a T-ruler and it will be super easy on the first go round!!
Thanks for visiting me today!! Hugs!! Lisa